Tuesday, 10 January 2012

Welsh Love Spoons

Love spoons are a big tradition here in Wales, and seeing an increase in popularity in recent years.

They were traditionally a betrothal gift from a suitor to his sweetheart and each of the symbols carries its own meaning. 


Love spoons containing caged balls (like this one) usually indicate the number of children hoped for. 

Hearts mean love
Entwined hearts mean love is returned
Horseshoes mean good luck 
Locks indicate security in the home
Bells symbolise a marriage
A harp means the music of love
A daffodil symbolises both Wales and affection
A double bowled spoon indicates togetherness
A knot symbolises the thread of life 

Most times the spoons would combine symbols to give different messages. 

I’ve gathered quite a collection of spoons over the years, given to me by my husband – some received as an apology after an argument!  I’ll summarise the meanings for you.


This one we bought after we were together first.  The vines and grapes indicate a hope for love to flourish.


This one my husband bought me after one of our first arguments.  It’s a double heart and a horseshoe and, in his words, it means “I love you very much and I need a bit of luck”!  It traditionally means I wish you love and luck!


This one, with the double heart and the lock also contains a Celtic cross.  The meaning of this spoon is wishing the receiver love, faith and security in their home and marriage.  The double heart also means love is returned.


These small ones are tokens.  The larger of the two was given to me after an argument.  He said it means “I’m sorry, but not that sorry”!  The smaller of the two was one of the wedding favours we used.


My favourite is this spoon, the one we bought to celebrate our marriage.  The lock, heart, horseshoe and bells on this symbolise our hope for love security and luck in our home and in our marriage.

At 47, I don't expect to receive one containing caged balls!!

Bacon and Tomato Pasta Bake


January is always a lean month in our house!  Partly as a means of tightening the purse-strings after the excesses of December; partly as a calorie control measure but mostly because after all the rich food during the run-up and over Christmas, I crave lighter meals. 

This pasta bake, when I broke down the costs worked out at less than £2, for two of us! 

As a general rule I find pasta bakes a bit of a faff to make; two pans on the hob and a further oven dish – that’s a lot of washing up!  To make it worth doing I usually batch cook and make enough to have another two meals in the freezer. 

As I had pasta leftover in the fridge from yesterday’s pasta bake, I just made enough for today (actually, I planned ahead and cooked twice as much pasta yesterday so that I could use it today!).  It took less than 15 minutes to prepare, and then 20 in a hot oven.  How convenient is that! 

For two people I used : 
3 thick rashers of bacon, cut into strips
1 x 450g tin of tomatoes
Salt and pepper to taste
180g pasta
Freshly grated parmesan cheese 

Dry-fry the bacon in a small frying pan until it starts to brown, season with a little black pepper and stir around.  Add the tinned tomatoes and stir, simmer for a minute or two. 

At the same time, cook the pasta according to packet directions, drain, return to the pan and add the sauce and combine the two together. 

Decant into an oven-proof dish and add a grating of parmesan cheese.  

Bake at 200oC for 20 minutes, until the cheese and top pasta is browned. 

This just needs a little bread to mop up the delicious tomato juices and a nice salad on the side.   

Now I think about it, a handful of black olives would make a nice addition to this – I’ll try and remember that next time I make it!  A handful of torn basil wouldn't go amiss either! 

* You could cut down on the work, and washing up if you make it with cooked ham.  In that case you’d only need to cook and drain the pasta, add the tinned chopped tomatoes and the ham, season, combine and tip into your oven dish.  Even less work again if you have leftover pasta in the fridge.  It’s worth bearing this in mind if you know you have a busy day coming up and still want something easy to come home to. 

Sunday, 8 January 2012

Italian Baked Fish with Salsa Verde

I can’t claim any credit for this recipe as it’s one from my absolute favourite cookery writer, Delia Smith.  The original recipe is in How To Cook book two (Oven-roasted fish with potatoes and salsa verde).   

I would post a link to the recipe on the Delia Online website, but I am having problems accessing it at the moment, since unwisely clicking on a link on an acquintance’s Facebook page.  I know, I should have known better! 

Anyhow, I digress!  This is an absolute beauty of a recipe so I knew I had to share it with you all.  It’s a regular feature in my kitchen.  I make up a big batch of the sauce at once and keep it in a small Kilner jar in the fridge. 

As always, I’ve modified the recipe slightly in using over the years but this is what I use : 

1 bunch of fresh basil
1 bunch of fresh parsley
1 big clove of garlic
6 anchovies
1 tb capers
1tsp English mustard powder
Juice of a lemon
½ cup of olive oil
Salt and pepper 

I use a mini-chopper to make this, and chop the herbs, garlic, capers mustard powder and anchovies together with the seasoning, then add the lemon juice and olive oil.  I actually like it quite lemony so I always use the juice of the whole lemon.  The original Delia recipe uses 4 anchovies, 1½ tb of lemon juice to 6tb of olive oil, and wholegrain mustard in place of the English mustard powder.

I usually spread a dessertspoonful of the sauce over a fillet of fish and cover with a layer of sliced par-boiled potatoes.  Then add a sprinkling of grated cheese – I use cheddar and a little parmesan.  Bake in the oven at 180oC for approximately 20 minutes, until the cheese is nicely browned and the fish cooked through.

In the depths of winter this beauty of a dish really livens up the palate!  I usually serve it with green vegetables – peas, beans or broccoli; but salad would be nice too.

Welsh Cakes

What can I say about these little beauties?  I grew up on these, my Grandmother, who lived in the same street as us and with whom I was incredibly close, used to bake them all the time.  My mother, who didn’t like them, used to bake them often for us – they were a staple of my childhood!  


Hubby loves them, and sometimes I make one or two with a heart cutter for him – usually when I want something but hey ho, it’s the thought that counts right?! 


These are at their absolute best while still slightly warm off the bakestone and with a cup of Earl Grey for some reason!  They don’t keep very well, which is just as well as they don’t hang around.  I always sugar mine but if you keep half un-sugared, if they last longer than two days they are delicious buttered. 

Traditionally cooked on a bakestone – a cast iron flat griddle.  Mine came to me from my
mother and was made for her by my great-uncle ....... at work in his job as colliery blacksmith! 

The recipe I use is as follows : 

12oz plain flour
8oz butter (or margarine)
5oz sugar
5oz dried fruit (I usually just use currants)
1tsp baking powder
½ tsp mixed spice
Pinch of salt
1 egg

Sieve together the flour, baking powder and mixed spice and add the sugar and butter and rub together as though you are making pastry.  I stick the whole lot in the KitchenAid and let it get on with it!  Then add the dried fruit and then the egg to bring it all together.  If it seems at all dry add a drop of milk.    

Roll out to a ½” thickness on a well floured surface and using a 2 ½” cutter cut into rounds. 

Lightly grease and heat your bakestone on the hob and cook the cakes for approximately 4 minutes each side.  The timing is very hit and miss to be honest, because the temperature of the bakestone depends on how long it has been on the heat and how high the heat is!  All I can say to you is to use your eyes and nose.  Flip them over when you think they are done on one side and check the colour – if they are underdone just flip them back to finish later. 

As they are done remove to a cooling rack and sprinkle with caster sugar on both sides. 

Some people prefer them with jam instead of fruit.  If you want to try that proceed as above but omit the dried fruit and when the cakes are cooked split them through their middle and spread with jam. 

I prefer them sugared, or stale and buttered!

I’ve made these for the cricket club from time to time and they disappear at an alarming rate when the tin is brought out! 


I’d like to dedicate this recipe to my lovely Grandmother.  She’s been gone for 26 years and I still miss her.


Friday, 6 January 2012

Barley Salad

I came across some holiday photographs recently that were taken when we were in South Africa 6 years ago, they’ve spurred me on to get back on my healthy-eating plan!  After too much comfort food the tonnes have crept on and need to be shifted – fast! 

This is one of my favourite healthy eating salads.  Best when the grain is still slightly warm, but good cold too.  A handy and versatile salad, I’ve packed it for picnics and served it at barbecues in the summer.  Any leftovers make a handy packed-lunch for workers. 

The salad pictured used the following : 

1 cup of spelt (you can use pearl barley, spelt or faro)
1 tomato, de-seeded and cut into strips
1 red chilli, de-seeded and diced
2 spring onions, sliced finely
1 stick of celery, diced
½ a red pepper, diced
1 avocado
Salt & pepper to taste
Juice of a lemon
1tb extra virgin olive oil
Small bunch of parsley roughly chopped

Cook the grain according to the packet directions then simply strain through a sieve and rinse with cold water (not too much as you want the grain slightly warm); add the olive oil and lemon juice and stir then season well and add the rest of the salad ingredients.

This is a very versatile versatile salad, you can add almost anything to it.  I’ve often included fennel, olives, feta cheese, strips of chicken or ham.  You can use pretty much anything you have lying around or that takes your fancy!

I hope you enjoy!

Sunday, 1 January 2012

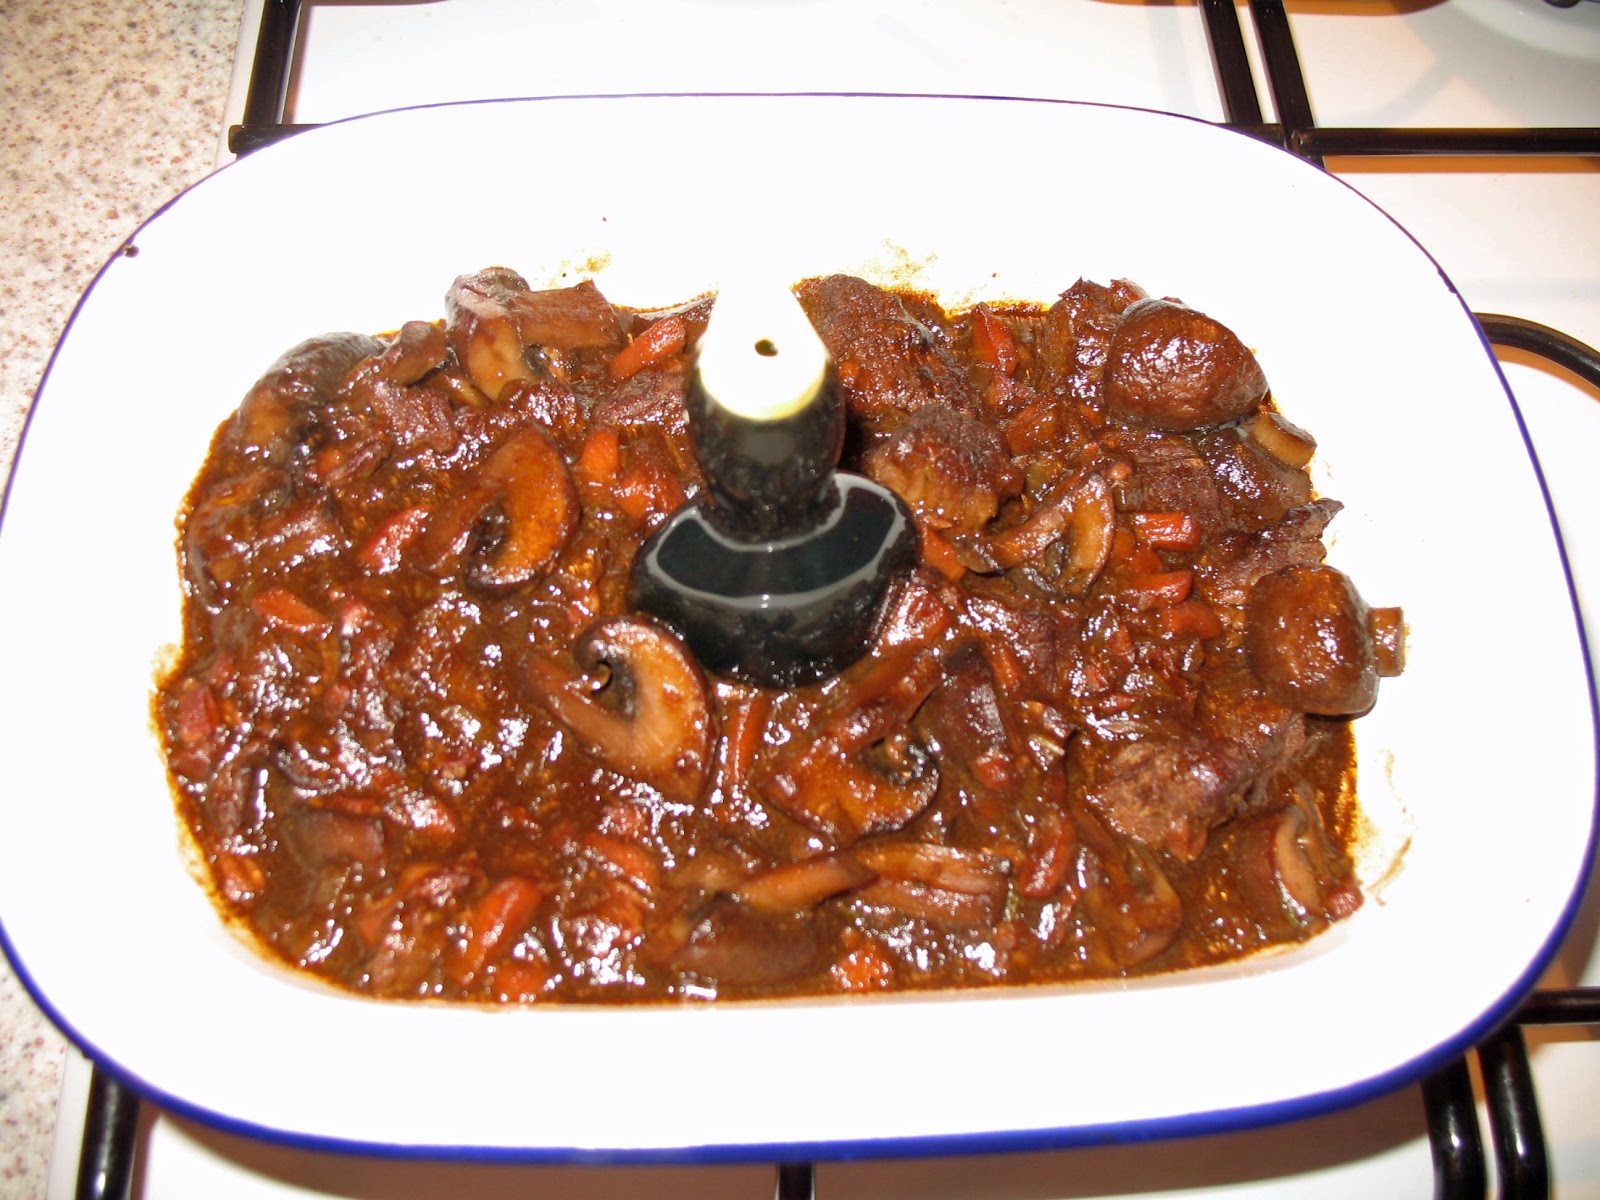
Steak and Guinness Pie

This was what we saw the New Year in with last night!  I often make a steak and Guinness casserole but I’m in full-on pie mode at the moment so I decided to give it a pastry lid.   
I always find making something like this the day before you want to eat it is best, as the flavours develop and mature with overnight keeping. 

Guinness is a very assertive flavour, but the mushroom ketchup, tomato puree and Worcestershire sauce served to soften it a little.  By all means replace the Guinness with an ale if you prefer, or even leave it out all together and use all beef stock. 

1 onion
1 stick celery
1 carrot
1 clove garlic
1 or 2 anchovies
3 rashers of bacon
500g diced casserole steak
6 or 8 big mushrooms
Mushroom ketchup
Worcestershire sauce
Tomato puree
440ml can of Guinness
1tb flour
Seasoning
Sprigs thyme
2 bay leaves
¼ pint beef stock 


Peel and dice the onion and carrot quite small, wash and dice the stick of celery and sautee in a little olive oil (or anchovy oil) for 10 minutes.  Add the garlic and cook for a further 5 minutes, then add the anchovies and push around the pan until they melt.  Remove to a dish.

Add the chopped rashers of bacon and brown in a little olive oil.  Remove to the same dish as the vegetables. 

Add a little more olive oil and brown the diced beef in batches, removing them to the dish of vegetables as they brown. 

Return everything to the same pan and add the tablespoon of flour, stirring it around well.  Add the can of Guinness and stir well, scraping up anything sticking to the bottom of your pan.  Add the mushroom ketchup and Worcestershire sauce – as much as will fill the bowl of your wooden spoon, and a squeeze of tomato puree and stir in.  Then season and add the herbs.
Bring it up to simmering point and then pop into the oven to cook at 150oC for 3 hours.  After this time the liquid will pretty much have cooked away to leave a lovely rich gravy. 

After an hour, add the cleaned and quartered mushrooms and stir in. 


The pie I made is just a lidded pie, it has no pastry base.  To make it up, roll out a piece of flaky pastry about 2 or 3” larger than your pie dish.  Cut the extra pastry and use to line the edges of your pie tin.  Brush with beaten egg then add the pie filling.  Lay the lid over the dish and trim to fit.  Brush with beaten egg and cook at 180oC for 30 minutes from cold.


To make the Stilton pie, I added 2 teaspoons of Stilton cheese and dotted them around the pie filling.  For the pastry lid, roll out the pastry to a rectangle, season with black pepper and add some crumbled Stilton cheese to two thirds of the pastry.  Fold the bottom third over the middle third, and then fold that over the top third.  Re-roll the pastry and use it to top the pie as described above.  The cheese in the pastry gives a double-whammy of Stilton deliciousness, but you can leave it out if you aren’t as fixated as I am!


Happy New Year to you all!


Friday, 30 December 2011

Spaghetti Carbonara

This is a bowl of comfort food at its absolute best for me!  Bacon, egg and cheese – what’s not to like!  It takes less than 5 minutes to prepare, including boiling the kettle to cook the pasta, and takes only 10 minutes to cook.  What could be simpler than that. 
I feel faintly embarrassed giving a recipe for this, but it’s such an easy and tasty little number that it’s a shame not to. 

For two people : 

200g spaghetti or linquine 
4 rashers of bacon
2 eggs
Grated parmesan cheese (approx 2oz or so, to taste)
Freshly grated nutmeg
Freshly ground black pepper
Small bunch of flatleaf parsley 

Cook the spaghetti or linquine in salted boiling water according to packet directions, usually 10 minutes. 

At the same time, cut the bacon rashers into strips and brown gently in a small pan. 

Break the eggs into a bowl and beat together lightly, season with a little ground black pepper and freshly grated nutmeg.  Add a generous handful of parmesan cheese and mix together with a fork. 

Wash and roughly chop the parsley. 

Drain the pasta and return to the pan, add the eggy cheesy mix and stir around and then add the bacon and parsley.  Toss everything together until the egg has cooked in the heat of the pasta and the residual heat of the pan. 


Instead of cooking bacon you can, as I have this time, use cooked ham.  The dish pictured above was made using cubed leftover cooked Christmas ham.  The green parsley gave it a lovely festive finish!

You can, if you wish, make a little extra and keep it aside in the fridge to make a delicious frittata in a day or two.  If you do that, simply chop up the spaghetti with two knives, beat a further two eggs together and mix well through the pasta mixture, adding a little more grated parmesan cheese if you wish.  Then simply tip into a small frying pan and cook until the egg has set, popping under the grill for a few minutes to cook the top of the frittata.  I have made that a number of times, it’s particularly nice with a fresh goose egg!